English
German
Start Up
Starten
If you did not yet install Mumble see first: Installation
Wenn Mumble noch nicht installiert ist siehe zuerst: Installation
At start-up Mumble will present you with the picture:
Wenn Du Mumble startest kommst Du zuerst auf das Bild:

Click onto:
if not yet defined -- in that case you must fill in: (compare the picture at the right)
a name of your choice to remember what you use the server for
The address to be: flightgear-radio.autosoft.fr
The port must not be changed
Your username (must be your FGFS-UID if participating in ATC-events (so ATC can correlate your speech to a radar-target!)
if you did already define the server to be used
W?le dort:
"Add New" falls noch nicht definiert -- dann musst Du erst das rechte Formular ausf?len (vergleiche das Bildchen rechts)
Als "Bezeichnung" gib einen Namen Deiner Wahl, um Dich (sp?er) zu erinnern wof? Du diesen benutzt
"Address" muss sein: flightgear-radio.autosoft.fr
Der "Port" darf nicht ge?dert werden
"Benutzername" muss Deine FGFS-UID sein wenn Du an ATC-events teilnimmst! (Damit der ATC deine Sprache einem Radar-Target zuordnen kann!)
"Connect" Wenn Du Deinen Server bereits definiert hattest

You come to
your FlightGear Area, which again is subdivided in many groups.
You can extend/shrink the groups by clicking onto the triangle on
the left.
You first appear in the Main-group - that
means at the bottom (see the e.g. "jomo"). Get the mouse
over it and move it into the group you want, with the left
mouse-button is pressed.
Left of the names are symbols
that turn red when that participant is talking!
In the
left column there is a area for text messages - just type your msg
into the input field at the bottom. Interesting is also the
Damit kommst
Du nun in den FlighGear-Server, der wiederum in viele Untergruppen
aufgeteilt ist. Du kannst die Gruppen wie ?lich durch MausKlick
auf die Dreiecke links ?fnen/schlie?n.
Als erstes
erscheinst Du immer ganz unten in der Liste (siehe z.B. "jomo").
F?re die Maus dar?er und verschiebe Dich bei gedr?kter Maustaste
in die Gruppe in die Du m?htest.
Das Symbol links vom
Namen wird rot f? den der gerade spricht!
In der Linken
Spalte siehst Du Textnachrichten - falls Du willst tippe Deine
Nachricht einfach in die Eingabemaske ganz unten. Interessant dazu
ist auch
Configurations
Einstellungen
Menu --> Configure --> Text-To-Speech
If that is
active all written messages will be heard also over the
loudspeaker. That is very nice - if there is not much talking.
Otherwise it may disturb you a lot.
Further
Settings you access through the menu.bar. Watch especially:
Falls das
aktiviert ist werden Dir alle Nachrichten auch ?er den
Lautsprecher ausgegeben. Das ist ganz prima - so lange nicht viel
gesprochen wird. Ansonsten kann es sehr st?end werden!
Weiter
Einstellungen siehe im Men? Siehe insbesondere:
Menu --> Configure --> Settings
On each of
those Settings is in the lower left corner an "Advanced"
selection - that will give you more details! (But be careful
what you do - if you do not know what you do!)
One
more importand Setting is:
Auf jeder
Seite ist in der unteren linken Ecke eine Auswahl "Advanced"
- damit bekommst Du viele weitere M?lichkeiten. Aber sei
vorsichtig was Du machst - wenn Du nicht wei? was Du
machst!!
Eine weitere wichtige Einstellung
ist:
Menu --> Configure --> Settings --> Shortcuts
Under
"Functions" should be "Push-to-Talk" - if not:
Use "Add" to add an "Unasigned" and click on
that to chose "Push-to-Talk".
Then click onto
whatever is in the column "Shortcut" (e.g. "space")
and select which key you want to use as "Push-to-Talk".
(We suggest "Alt_L").
Unter
"Functions" sollte "Push-to-Talk" stehen -
falls nicht klicke auf "Add" um ein "Unassigned"
(noch nicht definiert) einzuf?en. Dann Klicke auf "Unassigned"und
w?le "Push-to-Talk".
Dann klicke in der
Spalte "Shortcut" auf was immer dort derzeit angegeben
ist (z.B. "space") und klicke dann auf die Taste die Du
als PTT benutzen willst. (Wir schlagen "Alt_L" vor).
Testing
You do not need to go anywhere to test your installation - Mumble always operates worldwide (like FGCOM 122.75!). Just move into a group where there is someone and try!
Du
musst nicht an bestimmten Pl?zen testen - Mumble funktioniert
immer weltweit (wie FGCOM 122.75!). Somit verschiebe Dich in eine
Gruppe in der schon jemand ist und versuche es!
Installation
Especially if
you use a Linux-based Operating System (OS) first have a look into
the Package-Distribution of your OS: In many of them you will find
a unique Download for your Mumble.
If so: Use
that
Otherwise see:
Insbesondere
wenn Du ein auf Linux basierendes Betriebssystem (OS
= Operating System) hast, schaue nach, ob es f? Dein OS
ein spezielles Paket zur Installation gibt.
Falls JA:
Benutze das
Ansonsten siehe:
Look for your OS and install according to the description there. You only need to install the Client ("Mumble"), you can disregard the Server ("Murmur").
Siehe unter Deinem OS nach und installiere entsprechend der Anweisungen dort. Du ben?igst nur den "Client" ("Mumble") - kannst also den Server auslassen.
After
starting Mumble first time, you should see:
(The
examples shown in the following are from a UBUNTU-Installation)
Beim
ersten Start des Mumble sollte folgender Bildschirm
erscheinen:
(Die
gezeigten Beispiele sind von einer UBUNTU-Installation)
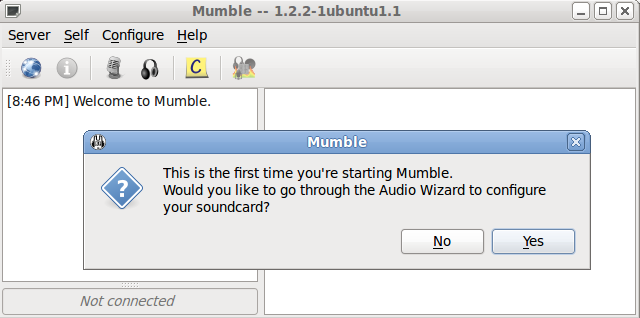
You should
follow the suggestion to first adjust the AUDIO, so click "Yes"!
(If you need to
readjust the AUDIO in the future, you find that setup also under
the application-menu: Window-Top-Menu
-> Configure -> Audio Wizard)
(Du solltest
unbedingt erst das Audiosystem einstellen, somit: "Yes"
Falls
Du sp?er das AUDIO nachjustieren musst, findest Du die gleiche
Routine im Men?innerhalb der Anwendung: Window-Top-Men?->
Konfiguration -> Audio Assistent)
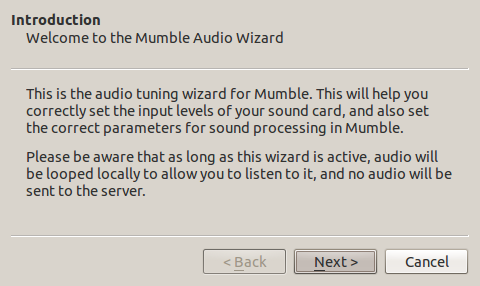

Click "Next
>" on the introduction to go to the first setting (the
right picture). Select your devices according to your system. If
you do not know your device try "Pulse" and "Default"
- if that does not work come back here later ("<Back")
and try something else!
"Next >"
Klicke in der
"Einf?rung" direkt auf "Next >" um zur
ersten Einstellung zu gelangen. Falls Du Dein Audio-System nicht
kennst, belasse erst einmal das "Pulse" und "Default"
- falls das nicht funktioniert kehre sp?er zur?k (mittels "<Back")
und versuche eine andere Einstellung!
"Next >"
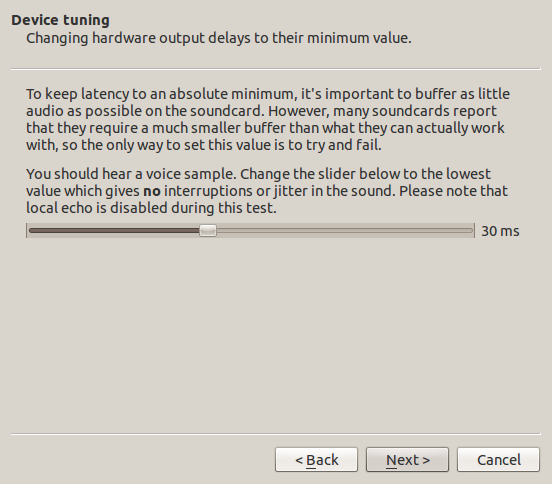

First use the
"Device tuning" to set the control just a piece below
that point, at which you hear the voice sample without any
disturbances. (e.g. 30 ms)
Then adjust the "Volume
tuning" so that:
- when not speaking the indicator
stays within the blue
- when speaking it stays within
the green
- and never goes into the red - also not when
speaking very loud!
"Next >"
Als erstes
justiere die "Device" (Ger?)
indem Du den Schieber etwas unterhalb der Stelle, an der der
Test-Text ohne St?ungen zu h?en ist.
Dann justiere das
"Audio" so das:
- wenn Du nicht sprichst der
Zeiger im blauen Bereich ist
- wenn Du sprichst er im
gr?en Bereich ist
- und er niemals in den roten Bereich
kommt - auch nicht wenn Du sehr laut sprichst!
"Next
>"
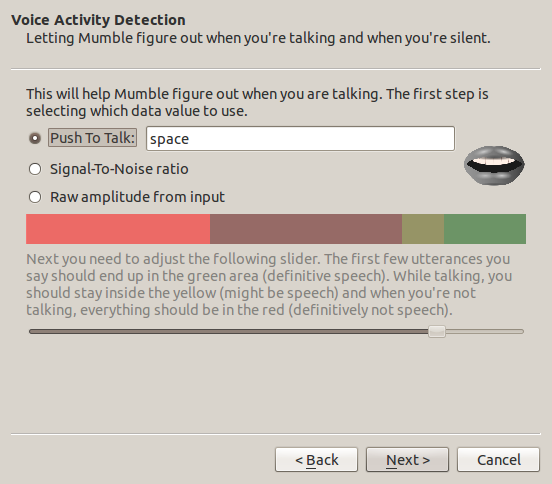

We do not
care about the "Voice Activity" (on the left) because in
FlightGear we only want to talk if the PTT button (Push To Talk)
is activated. (Nobody is interested in our private talks at
home!). So just activate "Push To Talk" and then click
into the field at the side and activate that key you want to use
when sending.
Also on the "Quality" leave the
Default ("Balanced"), at least for the beginning.
Wir wollen im
FlightGear nur Senden wenn wir den PTT-Switch bewusst aktivieren
(niemand braucht unser Familien Gespr?h zu h?en!). Somit aktiviere
einfach im linken Bild "Push To Talk" (Aktiviere
um zu Sprechen) und klicke dann in das Feld daneben und dann dr?ke
die Keyboard-Taste die Du zum Senden benutzen willst .
Auch
im rechten Bild ?dern wir m?lichst nichts - wir bleiben bei dem
Standard-Einstellung "Balanced" (Ausgeglichen).
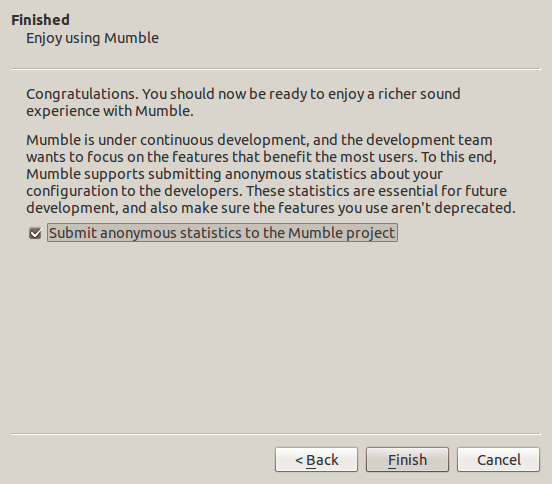
The
last AUDIO-GUI then just confirms we are finished!
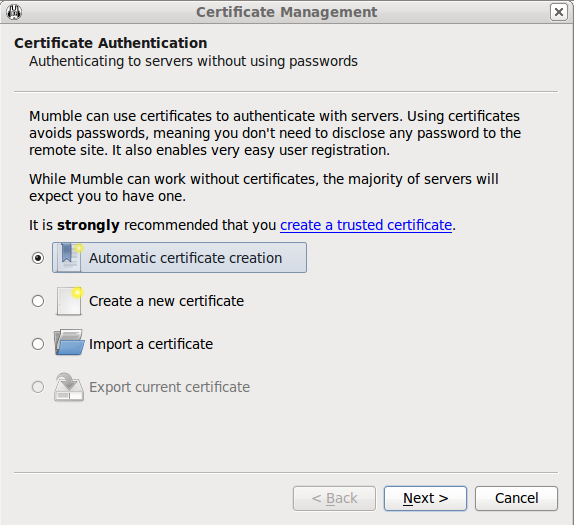
We
continue (automatically) with the "Certificate
Authentication" on the right, but PLEASE
LEAVE IT ON AUTOMATIC! We do not have any Secretes and
want to speak anybody to anybody!
Das
letzte AUDIO-Fenster best?igt dann, dass wir fertig sind.
Es
erscheint dann die Abfrage nach dem Zertifikat (siehe rechts).
BITTE LASS ES BEI AUTOMATIK!
Wir haben keine Geheimnisse und wollen das jeder mit jedem
Sprechen kann!
References
Referenzen
For Further informations see:
Siehe
weiterf?rende Informationen auf:
Homepage:
Basic:
Installation + Instruction:
http://sourceforge.net/projects/mumble/
http://mumble.sourceforge.net/Mumble:About
http://mumble.sourceforge.net/Mumbleguide
If you have any questions and/or improvements to this, feel free to contact me (jomo) via the Flightgear Personal Message system.
Falls du zu diesem Artikel Fragen und/oder Verbesserungen hast, schicke sie bitte an mich (jomo), ?er FlightGear Personal Messages!